

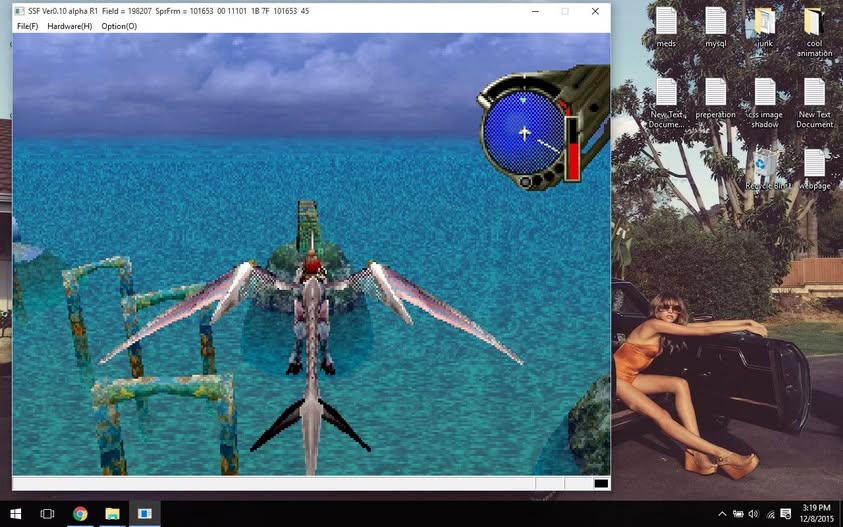
With AI and the innumerable tools on the internet, this is hardly anything groundbreaking. For somebody who wants the read me in the SSF (saturn emulator) in english, here it is!
Shima is a very private person, some have said, its because he enjoy his privacy. He is definitely ahead of the curve and edge of saturn emulation. If you want accuracy, without any bells or whistles, this is the best emulator you can find for Saturn Emulation.
○ Introduction
SSF is an emulator that recreates Sega’s consumer machine, the “Sega Saturn,” and its compatible devices on a PC.
Although still in development, it has been faithfully reproduced to a reasonable extent.
○ Operating Environment (Minimum Requirements)
OS – Windows7/8/10/11
CPU – CPU running Windows 7 or later
Memory – 4GB or more
Video – Cards supporting DirectX11
Must support shader model 5.0
Sound – Cards supporting DirectX11
Must be able to play 48,000Hz stereo PCM
CD drive – A drive compatible with MMC3
○ Operating Environment (Recommended Conditions)
CPU – Intel Core Ultra Series
Intel Core i9 Series
Intel Core i7 Series
Intel Core i5 Series
AMD Ryzen Series
Memory – Dual Channel 8GB or more
Other – BIOS
CD image used
○ About installation and UN-installation
No need to install it. Just extract the compressed file into a suitable folder.
Uninstalling simply deletes the expanded folder.
RegistryAdd.bat is a batch file that adds ‘Open with SSF’ to the context menu.
RegistryDelete.bat is a batch file to delete from the context menu.
Mainly assuming you select the CUE file and run SSF from the context menu.
Administrator privileges are required to execute batch files.
There is no other way to manipulate the registry.
○About BIOS files
You need to extract the BIOS from the actual device.
Save files from ProAction Replay that can be connected to a PC up to address 000000000~0007FFFF.
The file name is optional.
It works even without BIOS, but compatibility drops.
○ About the configuration file
The first launch of the game uses the SSF.ini settings.
Therefore, SSF.ini is the default value.
SSF.ini can be set when running without a disk. Setting.ini are presets.
Once a game is launched, the settings are saved in the Settings folder for each game.
SSF.ini and Setting.ini do not guarantee compatibility between versions.
items and settings may change.
Also, since it’s a text file, you can rewrite it directly.
Features that cannot be set in the options dialog include:
If you set [Program1] -DisableInput – to 0, it will accept input even if the window has no focus.
If you set [Program1] -MenuPause – 0, the emulator will work even when selecting a menu
[Program4] -68000 Type – When set to 1, it becomes a white Saturn (reproduces bugs like early Out-Run and Space Harrier)
[Other]-DateFlag – 0 sets the Saturn’s built-in clock to unset (only shows the time setting screen when BIOS is present).
If you don’t have a BIOS, it will remain 0 when you run it, but some software will only work unless you change it to 1
[Input] -VariableRapid – Variable firing range for each terminal and port (randomly variable +n/60 seconds)
and others.
○ Operation
You can use either a keyboard or a pad.
The default is
UP = UP Arrow
DOWN = DOWN Arrow
LEFT = LEFT Arrow
RIGHT = RIGHT Arrow
A TRG = Z key
B TRG = X key
C TRG = C key
X TRG = S key
Y TRG = D key
Z TRG = F key
L TRG = A key
R TRG = G key
START = Enter key
CD Open = F1 key
CD Close = F2 key
Hard Reset = F4 key
Emulator Restart = F3 key
Switching Rapid-Fire ON/OFF = F5 key
Sound ON/OFF Toggle = F6 key
State Load = F7 key
State Save = Shift + F7 key
Snapshot = F8 key
Sound Record = F9 key
Video Record = Shift + F9 key
Switch Borderless = F12 key
NBG0 display ON/OFF toggle = NUMPAD 1 key
NBG1 display ON/OFF toggle = NUMPAD 2 keys
NBG2 display ON/OFF toggle = NUMPAD 3 keys
NBG3 display ON/OFF toggle = NUMPAD 4 keys
Toggle display ON/OFF for RBG0 = NUMPAD 5 keys
Display ON/OFF on RBG1 = NUMPAD 6 keys
Toggle Sprite display ON/OFF = NUMPAD 7 keys
Screen rotation = NUMPAD 0 key (0 on the numeric keypad)
Swapping the ABC and XYZ buttons = NUMPAD 9 keys
Resize window = NUMPAD + key
Windows mouse cursor display ON/OFF = NUMPAD – key
Window/Borderless toggle = F12 key
Select CD image = Shift + F1 key
Option = Shift + F2 key
Debug output = F11 key (when Enable Debug ON)
Sound test = NUMPAD * key
The following cannot be changed
End = ESC key
The following cannot be changed (ST-V related)
1P Start = 1 key
2P Start = 2 key
3P Start = 3 key
4P Start = 4 key
Coin1 = 5 key
Coin2 = 6 key
Coin3 = 7 key
Coin4 = 8 key
TEST = 9 key
SERVICE = 0 key
A~N = A~N key (Mahjong Panel)
Kan = Ctrl key (Mahjong Panel)
Pon = Alt key (Mahjong Panel)
Chi = Space key (Mahjong Panel)
Reach = Shift key (Mahjong Panel)
Ron = Z key (Mahjong Panel)
The 2P side is not set by default key. Once you configure the port and key settings, you can use it.
Right after starting SSF, holding down Left Shift switches to ST-V.
Similarly, holding down Space temporarily lowers the 1Block Clock to 60% and starts up.
Similarly, holding down Ctrl temporarily toggles BIOS usage ON/OFF before launching.
Similarly, holding down Tab temporarily toggles the object cache usage ON/OFF before launching the game.
Similarly, holding right Shift temporarily toggles cheat usage ON/OFF before launching it.
Similarly, holding left Alt will set it to default and launch it (equivalent to the Default button in the options).
Similarly, holding right Alt will reset the controller settings and launch the game.
Similarly, holding down 1~5 will toggle the settings (supports [Setting1]~[Setting5] in Setting.ini files).
By default, Setting1~Setting5 are the same.
If you want to change it, please use a text editor or similar tool.
◯ Menu Description
・File – Create Object Cache
Create an object cache with the default option.
If bus weight is enabled, specify the bus weight enable option to create the bath weight.
If memory is low and there are many logical cores, memory shortages may occur.
In that case, please manually create the object cache by specifying the core count option.
Note that when using a CD drive, you cannot create from this menu. Please create it from the command prompt.
・Hardware – Reset
Reset the emulator.
To use a real device, it’s the same as pressing the reset button.
・Hardware – Restart
Restart the emulator.
Reload the configuration file.
To use a real device, it’s the same as turning the power off and re-plugging it on.
・Option – Hide Mouse Cursor
Prevent the mouse cursor from being displayed.
Enabled only when the mouse is enabled in controller settings.
Pressing the ESC key while hidden will display the mouse cursor.
○ Option description
・Save to SSF.ini Checking
will update the SSF.ini even while the game is running.
Check the box if you want to change the default value (SSF.ini) while launching the game.
[Peripheral Tab]
・Saturn BIOS
Specify the Saturn BIOS file.
The Saturn can operate without a BIOS, but compatibility will be reduced.
・ST-V BIOS
Specify the BIOS file for ST-V.
The ST-V requires a BIOS to operate.
・CD Drive
Select the CD drive you want to use.
Depending on the drive, the response may be slow and loading may not be completed in time.
We recommend using CD images.
・Cartridge
Select the cartridge to insert into the expansion slot.
・Area Code
Select the area code.
・Data Cartridge
When enabled, the specified file will be loaded into the ABUS-CS0 area.
This is an option for loading data cartridges, but operation has not been confirmed.
・CD Image
When enabled, it uses the CD image file.
Supported formats are CUE+Binary Image and CHD.
[Screen Tab]
・ScanlineCheck
to enable the scanline.
・Disable Fullscreen Scanline If you check
, the scan line will be disabled in full mode.
・Auto Field Skip If you check
, the speed will be adjusted automatically.
If the game is heavy even after checking the box, the machine power is insufficient.
・Enforce Aspect Ratio (Window)
・Enforce Aspect Ratio (Fullscreen)If you check
, it will force the Saturn aspect ratio to be set.
・Wide Screen If you check the box
, it will display wide screen (16:9).
・VSync Wait (Window)
・VSync Wait (Fullscreen) If you check
, wait for VSync to switch the screen.
・Fixed Window Resolution If you check
, you will no longer switch the resolution during window play.
The Saturn will display the maximum resolution window, with the active screen displayed in the center.
・Fixed Fullscreen Resolution If you check
, you will no longer switch resolution during full screen.
・Bi-linear Filtering Checking
will enable bi-linear filtering.
・Full Size Checking
will zoom in on the Saturn screen until the display resolution is at full screen when either vertical or horizontal is the display resolution.
・Gamma Correction Check
to enable gamma correction.
[Sound Tab]
・Linear Filtering Checking
will perform linear interpolation of PCM during resampling.
Linear interpolation is also performed on the actual machine.
・Alternative Decode Checking
will update the SCSP register (key ON/OFF) for each sample.
The sound is close to the actual device, but it’s heavy.
・New PCM Generate Checking
will enable the new PCM generation timing.
This software seems to be more accurate.
・Mute If you check the box
, it will go silent.
・Volume
Specify the volume in floating-point terms.
XAudio2 changes the master voice volume and Waveform changes the PCM itself, so increasing it may cause sound distortion.
The values you can set are 0.0~4.0.
・Buffer Size
Expand the sound and select the buffer size.
A smaller size means less latency, but depending on the sound driver or environment, playback may not be accurate.
Buffer Size is the size that transfers to the sound driver at once.
・CDDA Force Stereo If you check
, it will force CDDA to stereo.
Effective for games where CDDA is played in mono, such as the layer section.
You can check whether it is playing in mono by seeing ‘c’ displayed in the title bar’s ‘——‘.
・CDDA Auto VolumeIf you check
, the volume during CDDA forced stereo will be automatically set.
・CDDA Set EFSDL
If you check
, the EFSDL register will be automatically set during CDDA forced stereo.
Usually, it is fine to keep the checkbox checked.
・CDDA Force Stereo Volume
Manually set the volume during forced stereo setting.
[Controller Tab]
・Port1
Select the connection of Control Terminal 1.
・Player1:A~Player1:F
Select the devices to connect to each port of Multi-Terminal 6 connected to Control Terminal 1.
For direct connections, use the Player1:A setting.
In the case of ST-V, Player 1 is assigned to Player 1:A, Player 3 to Player 1:B, and Player 4P to Player 1:C.
You can configure each button using the Define button.
The Rapid is for rapid-fire use.
・Port2
Select the connection to Control Terminal 2.
・Player2:A~Player2:F
Select the devices to connect to each port of Multi-Terminal 6 connected to Control Terminal 2.
For direct connection, use the Player2:A setting.
In the case of ST-V, 2P is assigned to Player 2:A.
You can configure each button using the Define button. The Rapid is for rapid-fire use.
・Reset
Reset the controller settings to their initial state.
[Controller (Rapid) Tab]
・Enable Checking
will enable rapid fire.
・Set the rapid firing speed for each terminal and port.
The All button applies to all buttons.
[Program1 Tab]
・VDP1 Draw Thread If you check
, the drawing process for VDP1 will be on a separate thread.
Effective in multi-core environments and similar environments.
・VDP1 Draw Sync
Checking this box synchronizes the VDP1 rendering thread and the main thread.
Try checking the box with software that displays suspicious displays, such as sprites flickering.
When synchronizing, the VDP1 rendering thread may become heavier than when not in use.
・VDP1 Draw Sync Line Interval
Specify the sync line interval during synchronization.
The values you can set are 1~256.
・VDP1 Draw Strict Checking
will strictly synchronize the timing of main processing and drawing.
Try checking the box with software that displays suspicious displays, such as sprites flickering.
Since it gets heavy, it’s better to install only the software you need.
・VDP1 Draw Strict Block Clock
Specify the block clock value for Strict.
During VDP1 rendering, the specified block clock is set.
The values you can set are 1~99.
・VDP2 Draw Thread If you check
, the VDP2 rendering process will be handled on a separate thread.
Effective in multi-core environments and similar environments.
・Sound Thread If you check
, the sound generation process will be handled on a separate thread.
Effective in multi-core environments and similar environments.
If generating in a separate thread, generate in units of 128 samples.
・CD Block Thread If you check
, the CD block processing will be handled on a separate thread.
Effective in multi-core environments and similar environments.
However, the processing timing changes significantly, so compatibility will decrease.
・CD Block No Wait If you check
, the CD block will operate without weights.
CD access will be faster, but compatibility may decrease.
Depending on the software, it may actually slow down.
・DSP Thread If you check
, the DSP processing will be handled on a separate thread.
Effective in multi-core environments and similar environments.
Synchronization may take longer and may actually make things heavier.
・DSP Thread Always Running Checking
will keep the DSP processing thread running continuously.
Synchronization stabilizes, but it becomes sluggish.
・Priority Class
Specify the priority of the process.
・Set Affinity Mask
Checking the box will set the CPU affinity mask.
Threads are assigned in order starting from CPU0.
・Use XInput If you check
, XInput will be used.
If you notice suspicious pad input behavior in DirectInput, try using XInput.
However, when using XInput, you can only use up to four controllers (according to XInput’s specifications).
[Program2 Tab]
・CD Drive Read Sectors
Set the number of CD sectors to load from the CD drive at once.
Increasing this value speeds up CD loading, but some drives may cause errors.
The values you can set are 1~24.
・Dot Clock
Specifies the dot clock in floating-point terms.
The Saturn draws one dot at four system clocks (about 7MHz cycles).
This specifies how to draw one dot at what system clock.
Conversely, this section allows you to adjust the CPU speed.
If the dot clock is 4, the SH2 will be at the same speed as the actual machine, and at 2, it will be half the speed.
The values you can set are 1.0~4.0.
・1Block Clock
Set the number of clocks for SH2 to run at once.
Increasing this number makes it slightly faster, but compatibility may decrease.
When using BIOS, it works better to reduce the amount a little.
The values you can set are 1~1800.
・Check SlaveSH2 Idle Loop Checking
will enable idle loop check for the Slave SH2.
If it is determined to be idle loop, Slave SH2 will not be processed.
Some software may be slightly faster, but compatibility may decrease.
・Slave SH2 Speed
Set the speed of the slave SH2 as a percentage.
Set the percentage speed at which the master SH2 will move.
Since the bus arbitration of Master SH2 and Slave SH2 is not being emulated, this section will simulate it accordingly.
The values you can set are 1~100.
・CD Task Numbers
Set the number of tasks to process during the loading period of one sector.
If the device freezes due to CD access, try setting it to a larger number.
The number you can set is 1~20000.
・CD Drive Speed
Set the speed of the CD drive.
You can fine-tune it more precisely than NoWait.
・New SH2 Timing Checking
will use a new process to synchronize Master SH2 and Slave SH2.
If it doesn’t work, try unchecking it.
・SH2 Strict Checking
will split the SH2 code into individual instructions and execute them separately.
Usually, more than 1 BlockClock is executed together.
The timing of the Master SH2 and Slave SH2 is especially effective in games where the timing is strict.
・SlaveSH2 Sleep Clock
Specify the number of weights that slave SH2 can put into the Sleep instruction when executing.
If the behavior seems suspicious, try reducing it.
[Program3 Tab]
・Check Cycle Pattern Checking
updates the cycle pattern every line.
Check if the movie flickers, for example.
Compatibility improves, but it becomes a bit heavier.
・VDP2 RAM Revision Access If you check
, it will consider the misalignment of the VDP2RAM memory access location due to a cycle pattern specification error.
If there is dust on the screen or it is off, please check it.
Compatibility increases, but it becomes heavier.
・VDP2 RAM Write Timing If you check
, writing to the VDP2RAM will be done line by line.
Also, the display delay is 1 frame. Usually, there is a two-frame delay.
If you check Check Cycle Pattern, it will also update the actual data of the pattern name. However, only the first 2,048 bytes are included.
Memory access increases, so it becomes sluggish.
・VDP2 RAM Write Timing Buffer Size (MB)
Specify the buffer size for VDP2 RAM Write Timing.
The values you can set are 32~99.
・VDP2 RAM Write Timing Split Numbers
Specify the maximum number of partitions per screen.
Due to memory shortages, the number of partitions may be less than specified.
The values you can set are 1~256.
Be careful not to use too many of them, as memory shortages can cause unstable operation.
・VDP2 RAM Write Timing Renewal After Scanline Checking
will write to the VDP2RAM after passing the scan line (update after display).
Check the box for cases where tearing occurs in the movie.
・Memory Access Wait Checking
will enable memory access waiting.
Some software does not work properly because the timing is off, unless you add a memory access waiter.
To enable memory access waiting, set the dot clock to high.
・WorkRAMH Read Wait
・WorkRAMH Write Wait
Specify the memory weight value of the work RAMH.
If you want to change other memory weight values, please directly edit [Program6] in each configuration file using the text editor.
・Memory Read Wait Ratio
Specify the read memory wait rate when SH2 cache is off.
This will simulate the SH2 cache.
Lowering it to a higher cache hit state, and increasing it to a lower state can emulate a lower state.
・Memory Write Wait Ratio
Specify the write memory weight rate when SH2 cache is OFF.
・Bus Wait Checking the
box will activate the weights for each bus.
The processing timing is close to the actual device, but it’s heavy.
・SH2 Cache Checking
will enable SH2’s data cache.
Memory access waiters are also enabled.
To enable cache, set the dot clock to high.
Since this is a very heavy process, it’s best to check only the necessary software.
・SH2 Write Buffer Check
to enable the SH2 light buffer.When enabled,
it seems that overall memory access is faster than on the actual device.
If the screen rendering looks suspicious, try disabling it.
・Enable I Cache Checking
will enable SH2’s instruction cache.
・SH2 DMA Real TransferIf you check
, the SH2-DMA will behave more closely to the actual device.
・SCU DMA Real Transfer If you check
, SCU-DMA will behave similarly to the actual device.
If you see a movie or similar flickering, please check the box.If you check
and experience tearing or flickering instead, try reducing the SplitMemoryLineInterval value.
If it still doesn’t improve, it may be that there aren’t enough splits per screen.
If increasing the number of splits does not improve, GPU rendering may not be sufficient.
In that case, try disabling VDP2 RAM Write Timing.
・CD Track/Index Checking
will enable the index positions within the CDDA track.
Some games play CDDA with indexed settings.
The index-based software we have checked here is:
Taito Chase H.Q. Plus S.C.I.
Purikura Daisakusen
Striker ’96
Zanma Super Secret Technique: Valharian
・Split Memory Line Interval
Specify the line interval to check for writes to the VDP2RAM.
Try changing it when tearing occurs in movies or similar events.
If the maximum number of partitions per screen is too small, VDP2RAM updates may not be possible.
To reduce this number, increase the maximum number of splits.
・Split Read Access If you check
, code execution will also be split by memory read instructions.
・Split Write Access If you check
, code execution will also be split using memory write instructions.
・Enable Auto Refresh Checking
will enable (S)DRAM auto-refresh on the SH2.
Add weights with auto-refresh at regular intervals.
・Auto Refresh Interval
Specify the interval for auto-refresh.
The smaller the value, the spacing matches the actual machine, but it feels heavy.
[Program4 Tab]
・CD Access LED Checking
will display the CD access LED.
・No BIOS If you check
, you will no longer use the Saturn BIOS.
However, since some software does not work without a BIOS, using the BIOS is recommended.
If you don’t use the BIOS, backup libraries will always be hooked.
The ST-V requires a BIOS to operate.
・Hook Backup Library Checking
hooks the backup library and allows unlimited backup capacity.
Data is saved under the Backup folder.
・Enable FDD Checking the box
will enable FDD.
Only if you hook the backup library.
・Mesh Translucent Checking
will make the mesh drawing sprite semi-transparent.
Sprite processing becomes complicated, so it’s heavy.
Since this feature doesn’t exist on the actual device, it might not be possible to achieve translucency properly.
Textures that are meshed or meshed on BG surfaces do not become semi-transparent.
・Ignore 68000 Address Error Exception Checking
ignores the 68000 address error exception.
For now, checks are only required at Wan Chai Connection.
・Use Object Cache If you check
, it will use the object cache of SH2 code.
You need to create an object cache in advance.
・Use DSP Object Cache If you check
, it will use the object cache of the SCU-DSP code.
Since you don’t know the SCU-DSP code in advance, it is collected during execution and the object cache is created at the end.
Therefore, object caching will be enabled from the next startup.
At this point, the implementation is incomplete. Displays like Shining Force 3 are not functioning properly.
・Emulate Speed
Specify the emulation speed in floating-point terms.
If increasing this number doesn’t make you faster, your machine power isn’t enough.
If you uncheck Auto Field Skip, it will operate without weight.
The values you can set are 0.1~4.0.
When changing the emulation speed, please do not check VSync Wait.
・Video Frame Rate
Specify the frame rate for recording.
・Enable Debug Checking
will enable the debug feature.
It’s heavy, so it’s best to check it only when necessary.
・Enable Cheat Check
to activate the cheat.
・Enable Extract Sound If you check
, it will extract the sound from the built-in sound source.
When the built-in sound source is detected and data is extracted, the screen will display ‘Found new sound.’
Begin the sound test using the * key on the NUMPAD (the * for the numeric keypad).
・Enable Rewind Checking the box
enables rewind.
・Rewind Max
Specify the maximum number of rewinds.
The values you can specify are 1~999.
If you have enough memory, you can specify up to 999.
Please note that setting a large value may cause the startup to fail due to insufficient memory.
・Rewind Interval
Specify the interval for creating rewind data by the number of frames.
For 180, create every 3 seconds.
・Show Registers If you check
, it will display the register values such as SH2.
・Hide Message Checking
will hide the following messages.
Message for extracting built-in sound source
CDDA Monaural Playback Message for Borderless
[Program5 Tab]
Set the execution speed for each drawing command in VDP1.
If you want to reduce rendering drops compared to the actual device, please lower the magnification.
[Function Key Tab]
You can set keys such as CD Open.
For more details, please refer to FunctionKey.txt.
○ About the hooked backup files
The files under the Backup folder have the first 16 bytes of SSF headers, followed by raw save data for each game.
Header content is as follows
Offset 0~11 = NULL Comments
Offset12 = Language
Offset 13~15 = Timestamp ((Year-1980) 23) + (Month 19) + (Day 14) + (Hour 9) + (Minute 3) + DayOfWeek
○About ST-V
Protection has not been removed, so please consider it a bonus.
It is compatible with MAME’s ROM set, at least for now.
However, you may need to change the extension.
○ Additional notes on recording
Save the avi file in the Snapshot folder.
Processing drops and field skips are not considered.
To avoid dropping frames, you need a decent machine spec.
○ About Object Cache
Create it in CreateObject.exe.
For more details, please refer to CreateObject.txt.
○ About Input Optimization
Due to temporary implementation, only direct connection of the control pad is supported.
To use it, you need to enable the debug feature.
Pressing the End key while running the game tracks your input data.
If successful, the number of read/write addresses for the data will be displayed on the screen, and both the address and data will be output to the debug console.
Most software has 1~2 addresses.
If the numbers in parentheses are data and the values near the center are 02 FF FF, the tracking is almost successful.
You can check whether input optimization is actually being done in the window title bar.
If an ‘i’ is displayed, optimization is enabled.
If you want to disable input optimization, press the Back key while tracking.
Please note that since this is a provisional implementation, the settings have not been saved.
If it doesn’t work properly, try turning off the SH2 cache.
○ About the built-in sound source sound test
The extracted data is saved in the ExtractSound folder below.
Begin the sound test using the * key on the NUMPAD (the * for the numeric keypad). Please refer to the screen for the operation. You can also get through ESC.
The configuration file is text, so it can be rewritten.
The Fade Rate field is set to 1 for the shortest and 255 to the longest.
You can set the Title field as you wish. Only ASCII characters can be used.
The maximum Total Volume is 15, and the maximum Volume for each sound is 127.
Operation is not guaranteed if the maximum value is exceeded.
Please note that during the sound test, you cannot perform any options or other operations. You can operate the emulator’s Mute and Volume functions.
〇 About the content of the title bar
From the left
F:# = Field Count
S:# = Sprite Frame Buffer Switching Count
—— = ‘r’ = Rapid fire ON
‘m’ = Mute ON
‘n’ = CD Block No Wait ON
‘t’ = SCU DMA Real Transfer ON
‘i’ = Input optimization ON
‘c’ = CDDA is set to mono (‘C’ is being forced stereo)
MS6D = ‘M’ = Master SH2 is running
‘S’ = Slave SH2 is running
‘6’ = 68000 is running
‘D’ = SCU DSP is running
Two-digit hexadecimal = BG plane flag displayed
Two-digit hexadecimal = BG side flag masked (0x40 is sprite)
320×224, etc. = Screen resolution and interlaced flags (sprites and BG)
D:# = Count of failed processes
Four-digit value = Number of sound samples generated
L:# = Number of blocks loaded when using object cache
Numeric = Number of functions called when using object caching
○ Other
SSF is free software. However, copyright is not waived.
We are not responsible for issues caused by bugs or SSF use. Use at your own risk.
CREATOR -> https://x.com/FessX
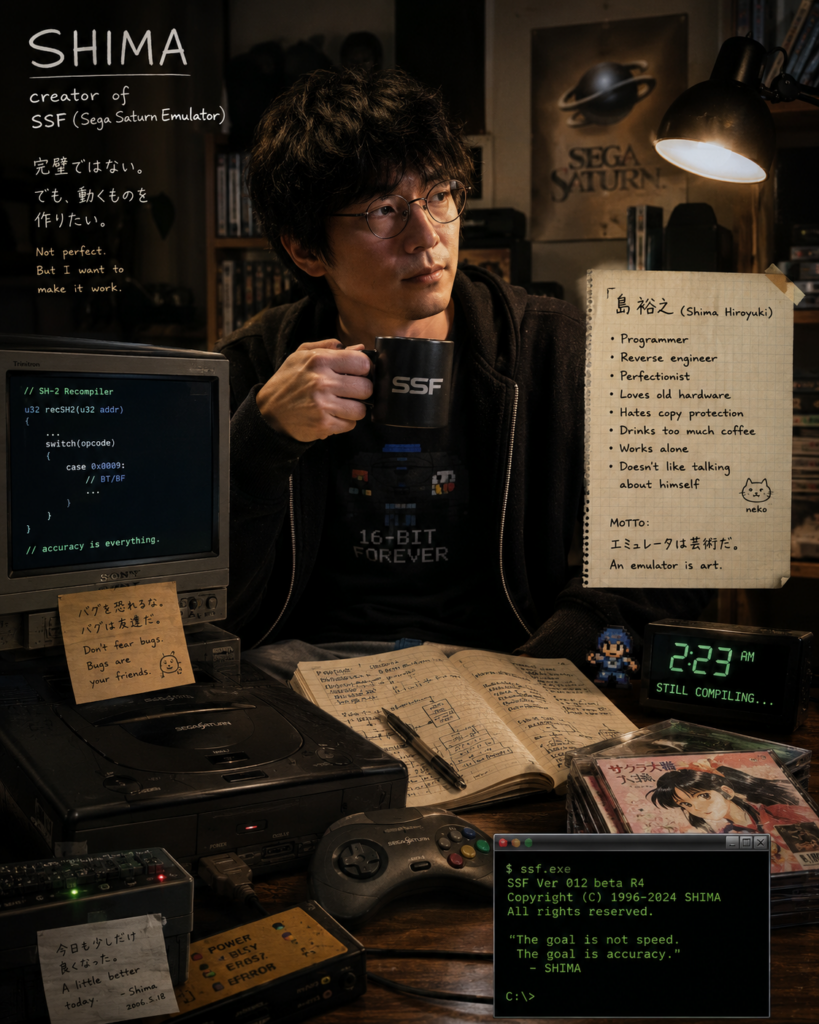
this is a rendition made with AI, this is not what he actually looks like.